Physical Address
304 North Cardinal St.
Dorchester Center, MA 02124
Physical Address
304 North Cardinal St.
Dorchester Center, MA 02124


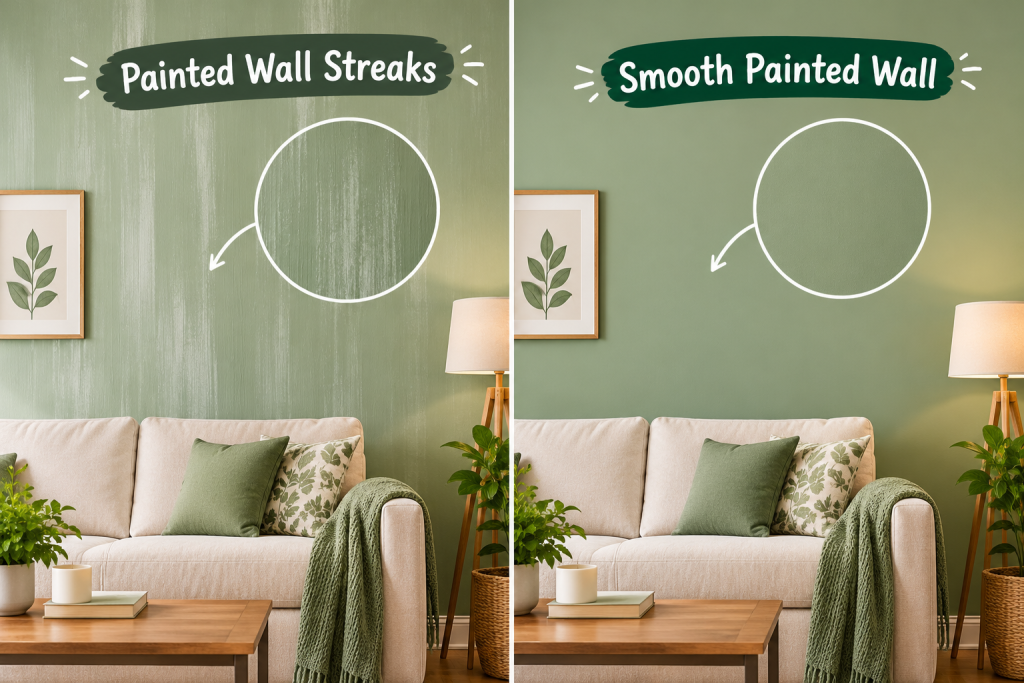
How to fix uneven paint is one of the most common questions homeowners ask after finishing a DIY project. You step back to admire your new wall, and then the light hits it, and you see streaks, dull patches, roller marks, and blotchy spots. The good news is that almost every paint problem can be repaired without starting over. With the right prep, a little sanding, and a smarter painting technique, you can get a flat, even finish that looks professional.
In this guide, you will learn why paint dries unevenly, how to diagnose the exact problem on your wall, and the step-by-step repairs that work for each one.
Before you pick up a roller, it helps to know what went wrong. Uneven paint almost always comes from one of a few causes:
Turn off the overhead lights and shine a bright flashlight sideways along the wall. This low-angle light exposes every flaw. Then match what you see to the table below so you know which repair to use.
| What You See | Likely Cause | Best Fix |
|---|---|---|
| Patchy, see-through areas | Not enough coats | Apply another full coat |
| Dull spots with a different sheen | Unprimed patches | Spot-prime, then repaint the whole wall |
| Straight dark or light lines | Lap marks | Sand lightly, then repaint in sections |
| Thin ridges or grooves | Brush or roller marks | Sand smooth, wipe clean, repaint |
| Tiny bumps and specks | Lint, dust, or dried paint bits | Sand the spot and touch up |
Learning how to fix uneven paint is much easier when you collect everything before you start, so the paint does not dry while you hunt for supplies.

Move furniture away from the wall, lay down a drop cloth, and tape off trim, outlets, and ceiling edges. Keep the room at a comfortable temperature, ideally between 10 and 29 degrees Celsius (50 and 85 degrees Fahrenheit), so the paint dries at a steady pace.
This process works for most interior walls. It starts with the gentlest repair and only moves to heavier steps when needed.
Paint can look streaky while it is still drying. Wait at least 24 hours before judging the finish, because many uneven spots blend out as the paint cures.
Lightly sand any ridges, roller lines, drips, or lint bumps with fine-grit sandpaper. Use gentle, circular motions and do not press hard. You only want to smooth the surface, not cut through to the wall.
Wipe the wall with a slightly damp microfiber cloth. Sanding dust left behind will show through the new coat and create fresh bumps.
If you see dull, flat spots, they were probably unprimed patches of filler or bare drywall. Brush on a coat of primer over those areas and let it dry fully. Priming evens out how the wall absorbs paint, which is the key to a uniform sheen.
Stir the leftover paint for at least two minutes, scraping the bottom of the can. If you are using several cans, mix them together in one large bucket, a method called boxing, so the color stays identical across the whole wall.
Work in vertical sections of about two to three feet. Always roll into the wet edge of the section you just painted and finish each wall without long breaks. This keeps the paint blending together instead of drying in separate layers.
Let the first coat dry according to the can, then add a second coat in the same direction. Two thin, even coats always look better than one thick coat.
Ceilings show flaws more than walls because light hits them at a harsh angle. The method for how to fix uneven paint overhead is the same as for walls, but you should paint across the shortest side of the ceiling and keep a wet edge at all times. On trim and doors, sand lightly between coats and use an angled brush with long, light strokes so the paint levels out smoothly.
If you want to compare techniques, Bob Vila’s guide on fixing a botched paint job covers patchy coverage, lap marks, brush marks, drips, and bubbles with simple repair steps for each. Reading a second guide is a quick way to confirm which fix suits your wall.
Many people searching for how to fix uneven paint repeat the same few errors the second time around. Avoid these:
Once you know how to fix uneven paint, preventing it is even easier. A few habits make a big difference:
Sometimes. If the problem is simply thin coverage, another full coat is enough. For ridges, roller lines, or bumps, however, light sanding is needed, because new paint will not hide a raised texture.
Let the wall dry fully, sand the ridges lightly, wipe away the dust, and repaint with a clean, high-quality roller cover. Roll with light pressure and overlap each pass while the edge is still wet.
Side lighting from windows exaggerates small differences in sheen and thickness. This effect is called flashing. Priming patches and applying a final even coat usually removes it.
In most cases, yes. Spot touch-ups tend to show as patches because the new paint and the old paint have different ages and sheens. Repainting the whole wall from corner to corner gives the most invisible result.
Follow the instructions on the can. Most latex wall paints need about two to four hours between coats, but cooler or more humid rooms may need longer.

Now that you know how to fix uneven paint, you can tackle streaks, patches, and roller marks with confidence. Diagnose the problem with a flashlight, sand and clean the wall, prime any dull patches, and repaint with a wet edge for a smooth, uniform finish. Take your time between coats, and your walls will look like they were painted by a professional.